Monday, July 11, 2011

Cat Scratch Fever!

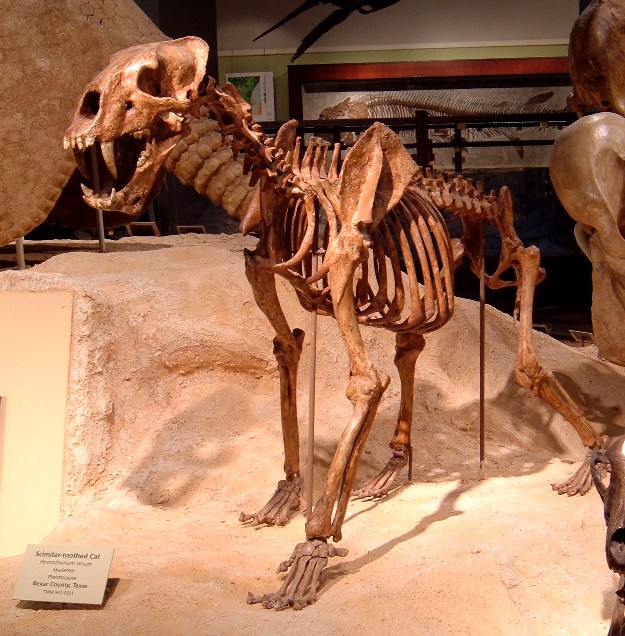
Taking advantage of the summer A/C maintenance related closure of the Texas Memorial Museum, we've taken the opportunity to pull some specimens from exhibit for study, conservation, and, in the case of the subject of this post, mold making. One of the stars of the TMM exhibits, a 1 and 1/4 size Homotherium serum  bronze sculpture adorns the front steps of the Museum. Pretty wicked, eh? A large number of specimens of this animal were collected 60 years ago from Friesenhan cave by TMM paleontologists, you can read more about the finds at the Museum's webpage.  Our collections hold what I understand to be the only complete skulls and skeletons of these lion-sized animals, including a couple of kittens!
Homotherium serum at the TMM, image courtesy Wikimedia Commons Skb8721

We've begun re-preparation and conservation of some of the holotype material, including the forelimbs from this mount, as well as molding and casting the specimens. We anticipate having a complete composite skeleton available in a few months time.
Sterling Nesbitt examining casts in progress

Left manus before conservation. Covered in chicken wire and dental cement.

Same hand after removing the accumulated crud, consolidating and repairing the bone, and correcting the articulation of the phalanges.

Elements laid up in clay for molding. RAWR.
Head and neck, sans atlas. What's that you ask? Oh, that! Yes, that skull is actually bronze. No, it really doesn't really get much more awesome than that. We made these bronze skulls for the Mammoths and Mastodons traveling exhibit developed by the Field Museum of Natural History. 


Sunday, July 10, 2011

Ridin' dirty

Now, witness the waterpower of this fully plumbed and operational polishing station. All right, all right, so maybe it's actually much closer to White and Nerdy. But, Sterling and I did get our hands very dirty getting this set up. Part one of Operation: Histology Lab was plumbing in a sink and Buehler Ecomet 3 Grinder/Polisher. The sink came from surplus, the grinder from my genius lab equipment supplier. Even though this room used to be a bathroom, there was no drain easily accessible. Fortunately, the sink in the prep lab is adjacent to the doorway to this space, and the hot water heater and plumbing are mounted inside this room. So, it was relatively straightforward to tie into both by punching a small hole in the wall and linking to the drainpipe for the prep lab sink. This also allowed us to clean 20 or 30 years worth of crap that had fallen behind the sink, including several complete stacks of paper towels that made for some awesome ant-farm-like rodent nests.
Yeah, this is more like what the mess in that closet looked like when we started, but this is after I already removed the flammable cabinet, a big bookshelf full of junk n' stuff, another smaller bookshelf full of the same, and another of the 48"w metal cabinets. Did I mention this room is 8'x13'?

Sterling cleans up the nastiness that remained after he cut out the back panel of the sink in the prep lab.

We took turns chiseling a hole through the wall for the drain to pass through, and I removed those faucets and tied into the hot and cold water to supply the sink and Ecomet.

Above the blue tape is where I cut the existing sink drain and tied in the new drain from the left, with the tee.

Trimming the existing drain pipe.


The Ecomet is plumbed on the supply side from the former eyewash mount with a ball valve here. There is also a valve under the sink, where we transition from the half inch pipe to 3/8 copper flex line and a compression fitting. I could probably do away with all of this for a cleaner behind the wall solution, but this looks kinda cool. Some day I'll make up my mind. On the return, the Ecomet bowl drains through a 1" ID vinyl hose into a tee I installed just above the P-trap under the histo lab sink. A pretty elegant solution, if I do say so myself.

Now I have to pee.

Friday, July 8, 2011

Plans for a histology lab

Ok, let's pretend I wrote this post a few months ago, when I actually started working on this project; you'll see an amazing and rapid progression over the next couple of days as I post the steps of the process that have been ongoing for a while now.

The goal of this project is to turn this cluttered (really, it was about 1500% worse than this photo at one point) storage closet and former VPL unisex bathroom into most of a histo lab. Over the past few months I've been accumulating equipment and cleaning all the junk out of this 13'x8' room with the intention of cutting a doorway in the far wall where that flammable cabinet sits in the photo. My goal was to connect this room to the office on the other side of the wall, creating a 26'x8' space, effectively a "clean room" on one side and a "filthy room" on the other. This is the design evident in the 3D rendering that I created in Google's SketchUp program. Which is an amazing program, and needs its very own post expounding upon that amazingness. I'll get to it one of these days.
So, several of our graduate students have been involving histological analysis in their research, and had been doing some of that work in the thin-section lab on the main campus in the Geology Department. Due to circumstances that I'm not aware of, our access to that space was revoked, and I was asked to find a place for the materials that we had already bought, which at that point was mostly the Buehler Isomet 1000 trim saw, some resin, and a minifridge. Since I'm a firm believer in one stop shopping (convinced that I can do almost everything cheaper and more accurately myself),  coupled with the goal of having our students exposed to the widest array of tools and techniques possible, I drafted an initial design for the lab. Future posts will detail the process of getting from the above photo to the below image. It has been lotsa fun so far!

The whole proposed lab, we aren't cutting a doorway in the wall now, though
Detail of histo lab

Molding class: Day 2

Molding class day 2 happened and it was also a great success. Most of the original group returned and some new people who couldn't make the first one attended also. Felt like I couldn't just leave that hanging.

Saturday, June 18, 2011

Molding class: Day 1

The group in the classroom mounting the specimens in clay. 
Yesterday saw the completion of the first day of a fairly informal molding class held at VPL. It was organized and mostly conducted by Dr. Sterling Nesbitt, with a little bit of help from me. The class was made up of a mix of volunteers and staff from both VPL and our neighbors NPL (the Non-vertebrate Paleontology Lab), undergraduates and UT VP grad students. The day started in the classroom with a safety briefing, followed by an introduction to different types of molds, an explanation of what we were molding and why, and conversation about ensuring that one has permission to make a mold before proceeding. Then Sterling gave a brief overview of the methods that he has been using to create molds for his research program, using pre-completed examples of the distinct steps in the process. The students next selected specimens and jumped into the process, first laying several bones up in clay, then applying Aeromarine AM 128 RTV silicone. Clay work was done in the classroom for the table space, and then rubber was poured in the prep lab. Due to a previous mishap with our vacuum chamber, the rubber was not evacuated before pouring, but a small amount was poured slowly and brushed over the surface of the bones. Then, a light amount of compressed air was directed at the bone surface to spread out and thin the rubber, the stretching and popping many air bubbles. The first halves of the molds were allowed to cure overnight, and next Friday the group will return to pour side two.

Weighing and mixing silicone
This served as a pretty good test of the lab design, which is geared towards teaching medium sized groups of students paleo lab methods in a hands-on fashion. The classroom has two large tables and space for about a dozen comfortably, a projector, and blackboard, and is directly adjacent to the prep lab. The lab space is currently divided up into two rooms, the large main prep area, and small work space with a fume hood and separate sink for acid work and casting and molding. Two more lab spaces are currently under renovation from an office and storeroom, becoming a histology lab and rock saw/air abrasive lab. I feel that the setup worked out pretty well, it has been functioning as a research preparation lab quite effectively for two years, with a large number of undergraduate volunteers and grad students having been trained one-on-one already.

[Edited 6/19] To spell Sterling's last name correctly, def Nesbitt, not Nestbitt. Sorry dude!
Painting and pouring silicone

Friday, June 17, 2011

This headline says it all...

Panhandle man cleaning foot sets house on fire... from the Sun Sentinel. Ok look, I lived in Florida for a year, and I'm not going to say that it is a state chock full of rock surgeons, but COME ON!

Wednesday, June 15, 2011

KA-BOOOOM!!!!!!

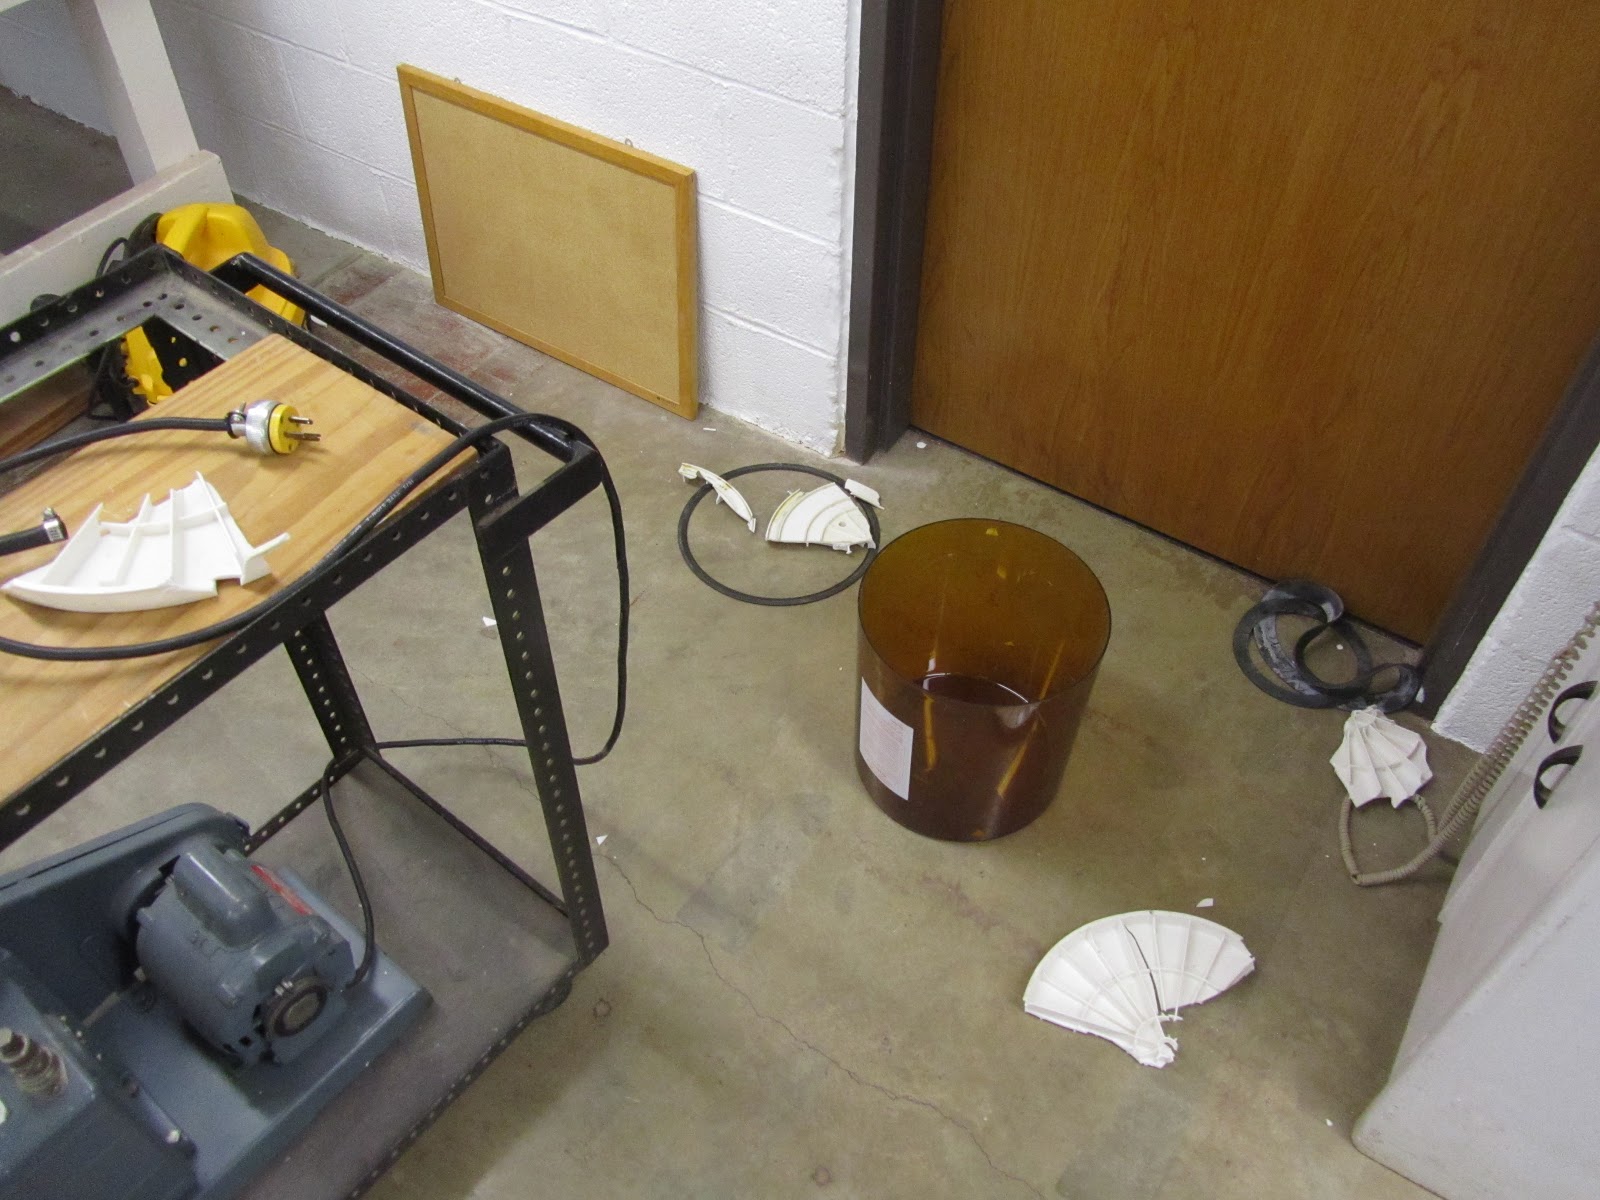
Speaking of lab safety.... I spent the evening soldering up a copper connection between my Welch Duo-seal 1402 vacuum pump and the cheap Nalgene bell jar that was on the shelf when I got here. Now, I figured an old plastic vacuum chamber (circa 1989) might not be up to the task of withstanding the forces, so I took precautions. Namely, I was wearing PPE and had my camera handy. As the gauge drew nearer and nearer to 30inHg I grew more and more incredulous that I really did such a great soldering job in the first place and that seals weren't crumbling at all and the bell jar seemed to be holding up to the constantly increasing stresses while the tension in the room grew palpable, somewhat squishy though oddly unyielding, and as it passed 29inHg and crept ever closer, yes improbably still closer to thBAM!!!!!e baseplate imploded with a thunderous crack and blasted shards of brittle plastic far and wide (and into my noggin' and torso), and catapulted the bell jar through a series of somersaults in the opposite direction. I immediately pulled the plug on the pump, took some photos of the mess, and then flipped the camera around to see myself smiling through the face shield I was not-accidentally wearing. Damn good thing this test wasn't conducted with a pot of resin in it, eh? That wasn't an accident either, by Jove! So now, as the hour has drawn late, I plan to stop on my way home at the local tavern for an oat soda.
[Edit 6/16] A friend on Facebook asks Q: What makes the baseplate so shitty?
A:The baseplate isn't inherently shitty, just made of plastic. And plastic doesn't last worth a damn, even though we think it exceptionally clever to build everything out of plastic these days. This baseplate was probably 20 years old, and if I'd peeled up the stuck down gaskets I would have seen some crazing that wasn't visible from the bottom. I'm guessing that this is a result of not just age, but also resin fumes. Contrary to "The Graduate", plastics are not the future. They are a temporary present.

Shame on me for not taking a Before picture. This is, uh, After.
Why is it that only old guys wink any more? I think we should recapture the non-flirtatious wink.

Whoops!